Google Tag Manager (GTM) is one of those tools that helps to easily add HTML or Javascript snippets to your website. There are several advantages of using GTM to add the code snippet of your chatbot. You get a centralized management platform for all the snippets on your site. It's easier to manage multiple chatbots using their interface and you can even specify where and how those chatbots should be launched.
It is also easy for marketers to manage multiple Javascript snippets on the site without the assistance of a web developer.
GTM works through a system of Containers, Tags and Triggers.
Tag: A tag is the snippet code that you add to your site.
Container: A container basically contains all the tags you have added to your website. When a new container is created, you get a container code from GTM. This will be the only code snippet that you add to your website directly. Everything else happens within GTM.
Triggers: A trigger can be any action on your website. For example, someone clicks on an outbound link, downloads a file, visits a certain page, etc. Every tag should be associated with a trigger, otherwise, the tag will not function.
Set up a GTM Account
Go to tagmanager.google.com and create a new GTM account, if you don't have one already. Provide a name for your account.
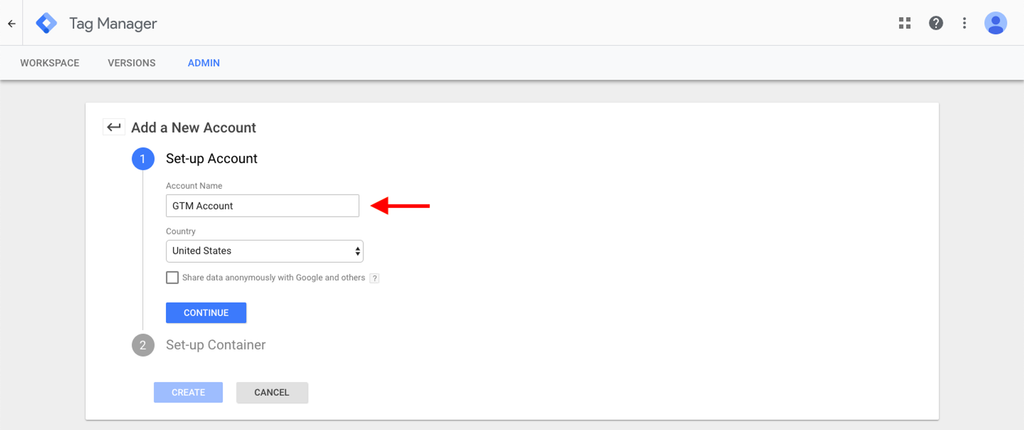
Set up the Container
Provide a name for your container. Preferably you can give it your domain name. Choose "Web" and click on Create.

Next, you will have to accept the GTM terms and services and you will be shown your container code. It will have two parts and there will be specific instructions on where this has to be added. If you are using WordPress, then you can use a plugin to do this.
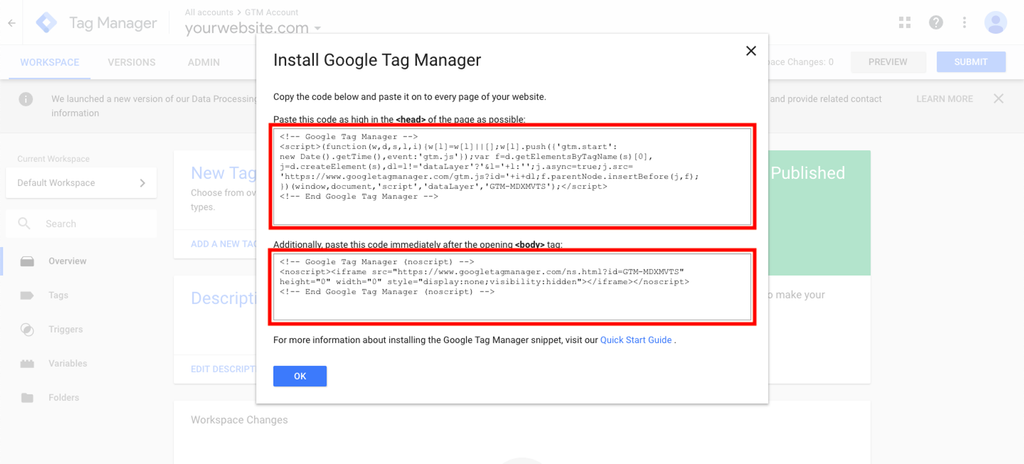
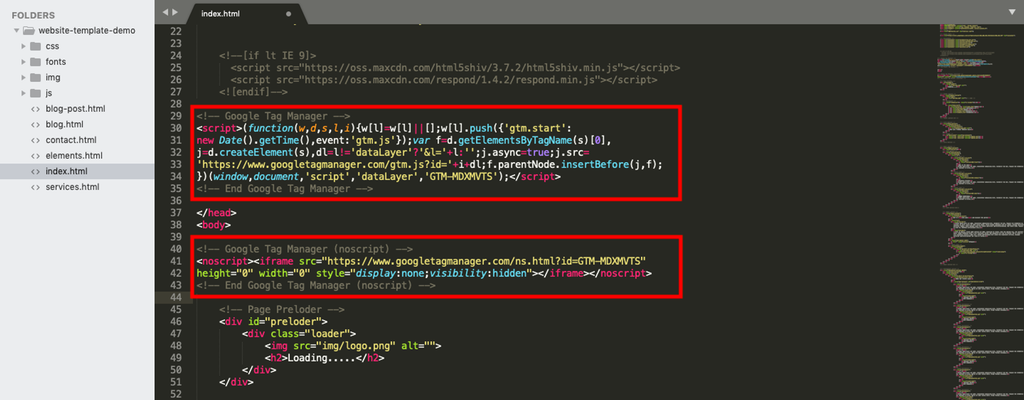
Add the Container Snippet to your Site
Here we are adding the container snippet to code a site that was made in native HTML.
Create a New Tag
Under Tags, click on New.

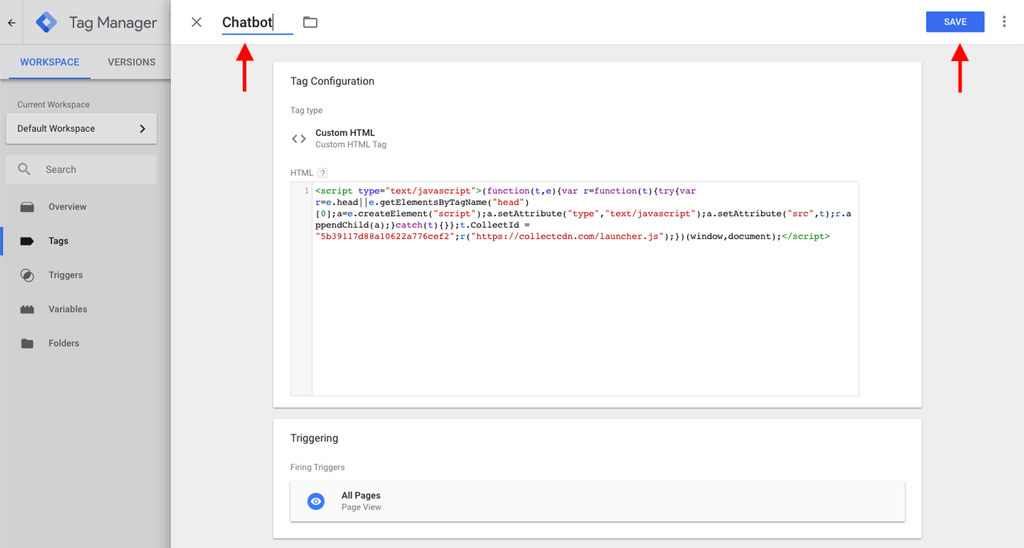
You have to choose the type of tag. For the purpose of adding the chatbot snippet code, we will use the Custom HTML option.
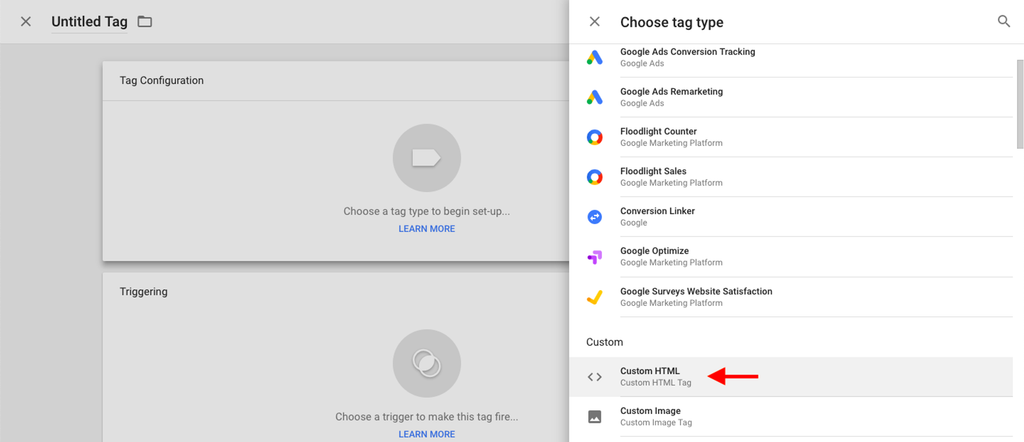
Copy the code snippet of your chatbot from your Dashboard > Edit > Share.
Paste the code snippet inside your tag.

Add a Trigger to your Tag
You need to add a trigger to your tag. The trigger will determine when the tag gets fired. You will find the option to add the trigger at the bottom.

There are many triggers available in GTM. Here we will use the All Pages trigger. This means that the current tag will be fired on all the pages of your site. You can create a new trigger using the "+" button in the corner.
Once the trigger is added, give your tag a name and click on Save.
Publish your Changes
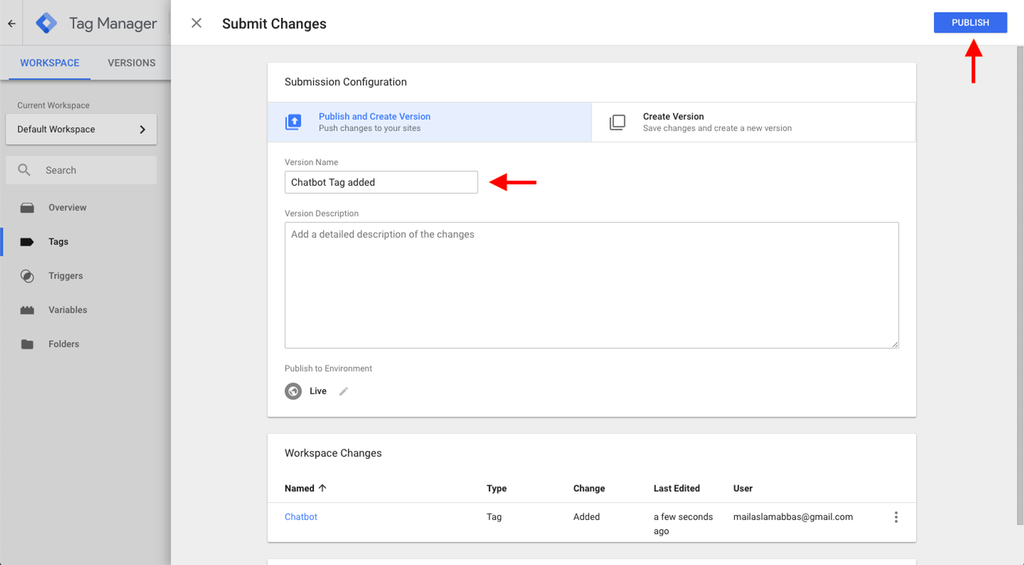
All the changes you have made inside your container will only become live once you publish it. For now, it's only in draft-mode. Click on Submit to proceed.

Changes you make to your container are saved as versions. Give a name to your version and click on Publish.
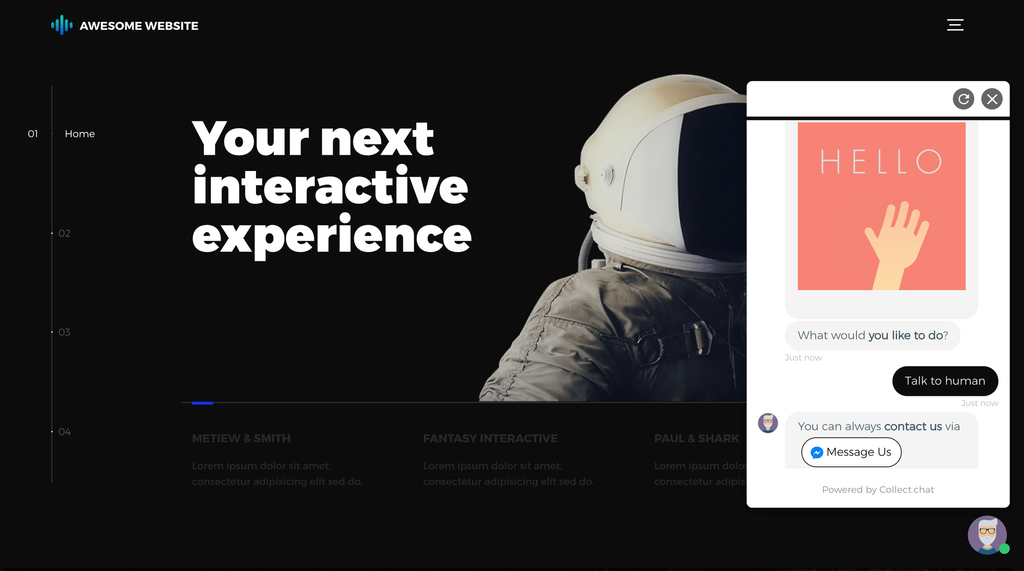
Now, go to your website to see if the chatbot is working on all pages. Make sure that the GTM container code is added on all pages. The tags will work only on those pages where the container code has been added.
Data Layer Variables
For those who wish to trigger tags depending on chatbot actions like chatbot open or close, etc, you can make use of the following data layer variables. These data layer variables are consistent with our Google analytics events.
Event triggered on widget open
{
“event”: “CollectChatView”
“page”: “”
}
Event triggered on each message
{
“event”: “CollectChatMessage”
“page”: “”
}
Event triggered on conversation complete
{
“event”: “CollectChatComplete”
“page”: “”
}
Tip
You can use GTM to customize how the bot appears on your site using triggers. Here are some examples.
You can fire the chatbot based on how much the user has scrolled through the web page using the Scroll Trigger.
You can fire the chatbot when a special link is clicked using the Click Trigger.
Using the Page View trigger, you can fire different chatbots on different pages. Create tags for each chatbot and set the Page View trigger accordingly.
You can choose to show the entire widget after a period of time using the Timer Trigger.
If you want to fire the bot based on dynamic elements that appear on your web page, you can use the Element Visibility Trigger.
Still need help?
Contact us