
Salesforce is one of the pioneers in Cloud CRMs. Over time they have built a powerhouse of tools and applications to manage your business. By integrating the data collected via the form into their CRM you can manage your leads much easier. Here are the instructions for the same.
Note
The team at Collect.chat is working on a single-click integration. At the moment we recommend using Zapier to make the integration. The following method will allow you to integrate directly. It uses Collect.chat's ability to submit data to a form. However, the procedure described may require diligent effort.
Caution
The following method has been explained using screenshots of the other tool. If you notice a mismatch from the present dashboard, please contact us and we will rectify it immediately.
Log into Salesforce
Create Web-to-Lead Form
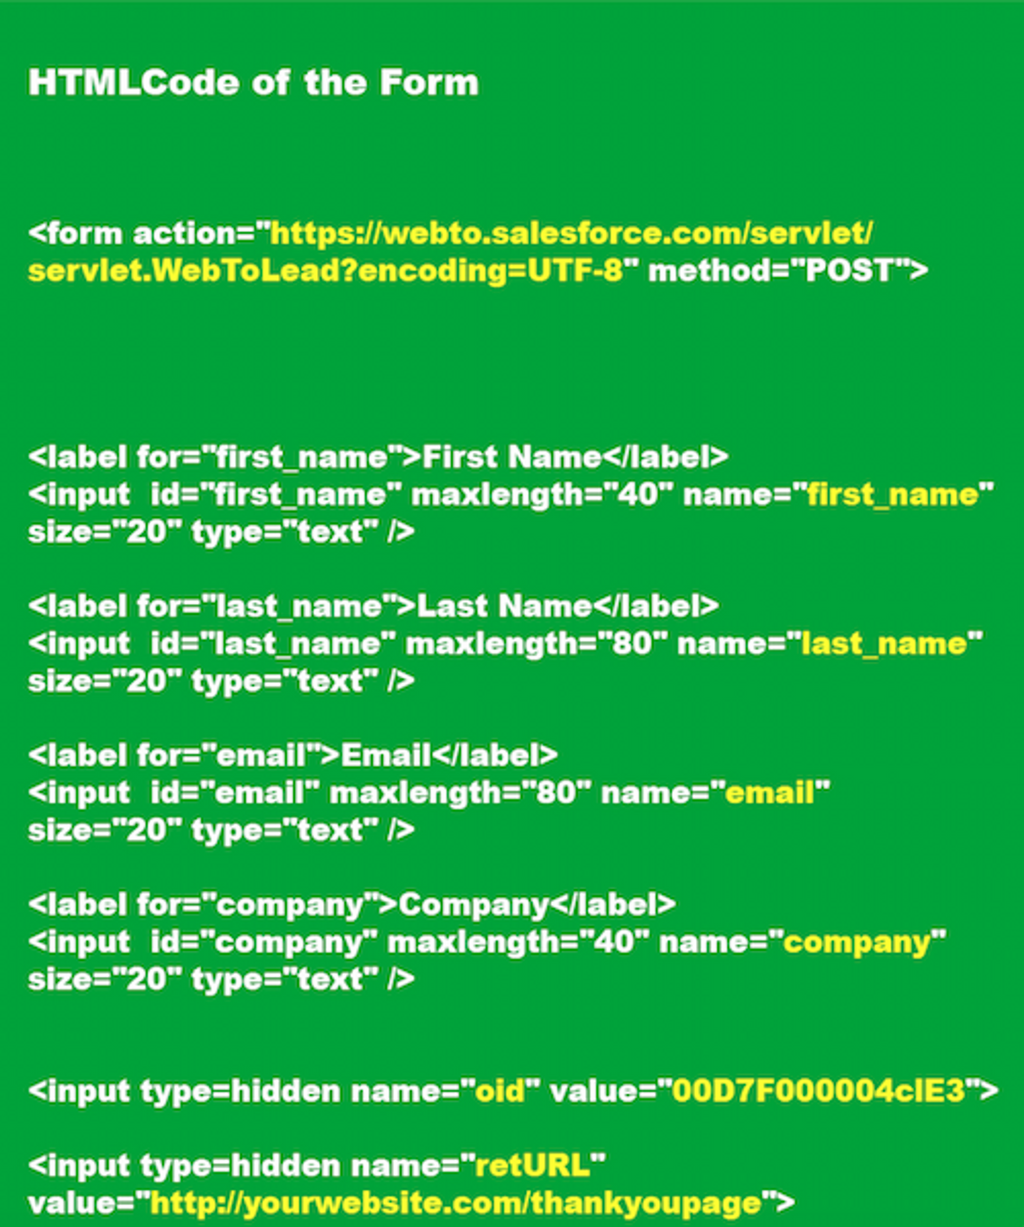
Salesforce allows you to create Web-to-Lead forms that can capture data and push to their platform. You have to create such a form first. Then you can send the data collected by the form to the Salesforce record.
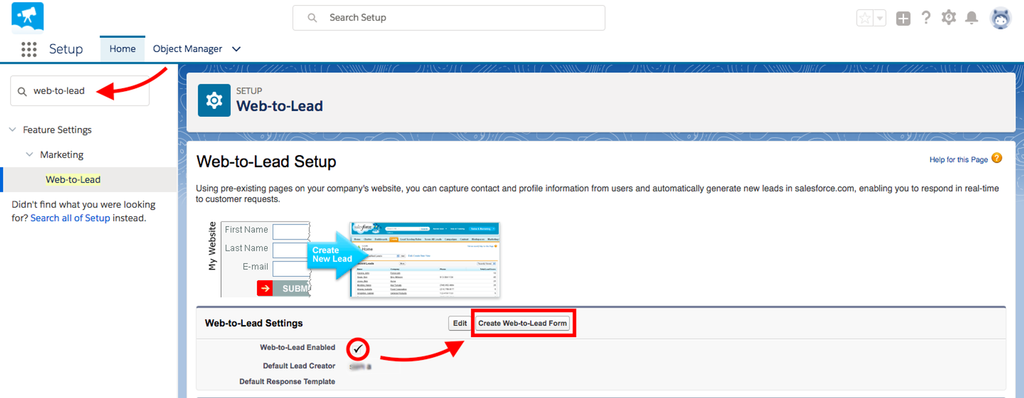
To start, click on Setup under the settings gear icon.

You will see the Quick find search field.

Search for web-to-lead and you will find it under Marketing. Enable Web-to-Lead and click on Create Web-to-Lead Form.
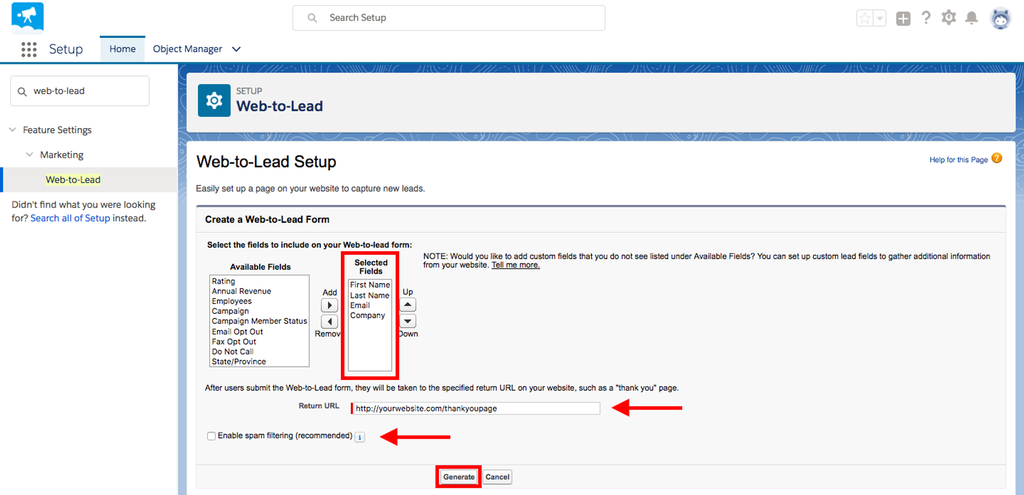
Select the fields which you plan to populate using the form. The Return URL is mandatory as per Salesforce settings. You can fill it with any link you choose since it does not matter to the current integration. Make sure you have unchecked the Enable spam filtering. This is not required since you will be collecting data via the Collect.chat form and not the Salesforce form directly.
Once you are done, click on Generate.
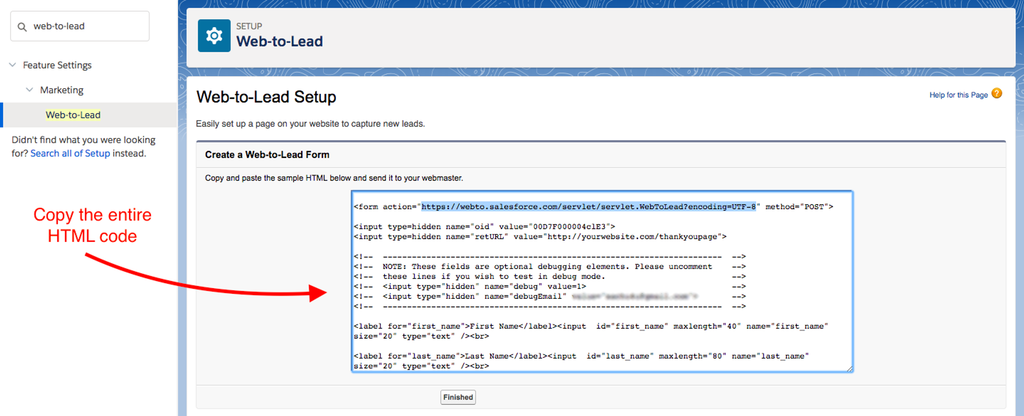
Copy the HTML code of the form for future reference.
Update Integration Settings
Now you will be adding the information from Salesforce fields to the Collect.chat form. Go to Integrate > Webhook and click on Create new Webhook. Make sure that the value for Content Type is
application/x-www-form-urlencodedNext, it is all about matching the correct values (highlighted in yellow).
The Webhook URL should contain the value of the action attribute.
Each question is matched against the value of the name attribute of the input element.
Finally, you have to add the hidden keys from the form. Search for "hidden" inside the form to find these elements. You can add a new hidden form field using the + button. The key will be the value of the name attribute. The value will be the corresponding content of the value attribute.
Once all the values have been filled in, the integration settings will appear as shown below. Double-check that you have added the right values to the right labels.
Test the Integration
You can test if this integration is working or not by giving a dummy response to your form. Go to the Edit > Design section inside the dashboard, click on the Eye-shaped icon, and record a complete response.
Make sure that the response is recorded in the Results > Responses section.
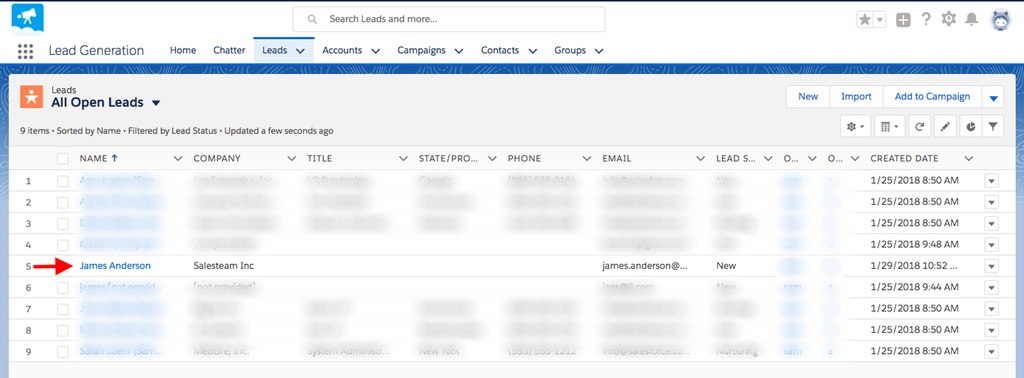
Go back to your Salesforce dashboard. Under Leads see if the user information was captured or not.
Still need help?
Contact us